I’m making wine. The process is a delightful combination of craft and science. I had no idea where this mission would take me - from harvesting grapes in bucolic Sonoma, to exploring the micro-biology of malolactic fermentation. It has been way more complicated than I expected, but also way more fun. Surprisingly, I found no good existing guide for this on the web, so I’ve documented the experience here, hopefully in enough detail that you can make your own wine. You can follow my realtime progress and join the conversation via the blog posts above.
A few years ago we spent a wonderful day at J Rickards winery in the Alexander Valley. J Rickards runs two “Harvest Hands” days each year where you head out to the vineyard, learn to harvest fruit, sort and crush the grapes and bottle wine straight from the barrel. That experience whetted my appetite to find out more about how wine is made. This year, when a good friend called to say that they had some grapes that needed to be harvested that same weekend, we decided to try making our own wine at home from harvest to bottle… I’m quite sure we had no idea what we were letting ourselves in for, but it has been a tremendous amount of fun.
Harvesting the grapes
We were invited to take as many grapes as we needed from a row of Primativo (genetically identical to Zinfandel) near Sonoma. We harvested about 120 lbs in total into two big plastic bins. Getting the grapes off the vine is quite simple. People talk about picking grapes, but it’s not picking exactly - you cut the stems close to the vine to detach whole clusters of grapes together with their stems. You can do this with a specially designed grape picking knife or a pair of garden shears.
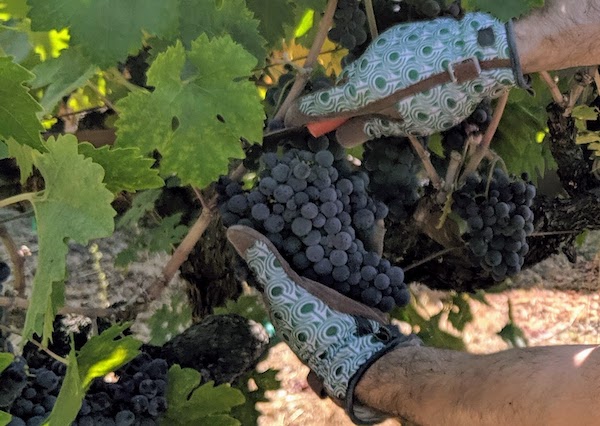 Working along the vine and taking every single cluster we filled big canvas bags and weighed each with a luggage scale, offloading into the plastic bins and stopped once we had 120 lbs. An inquisitive toddler, delighted to be able to taste grapes right off the vine, slowed us down but the whole process took less than an hour.
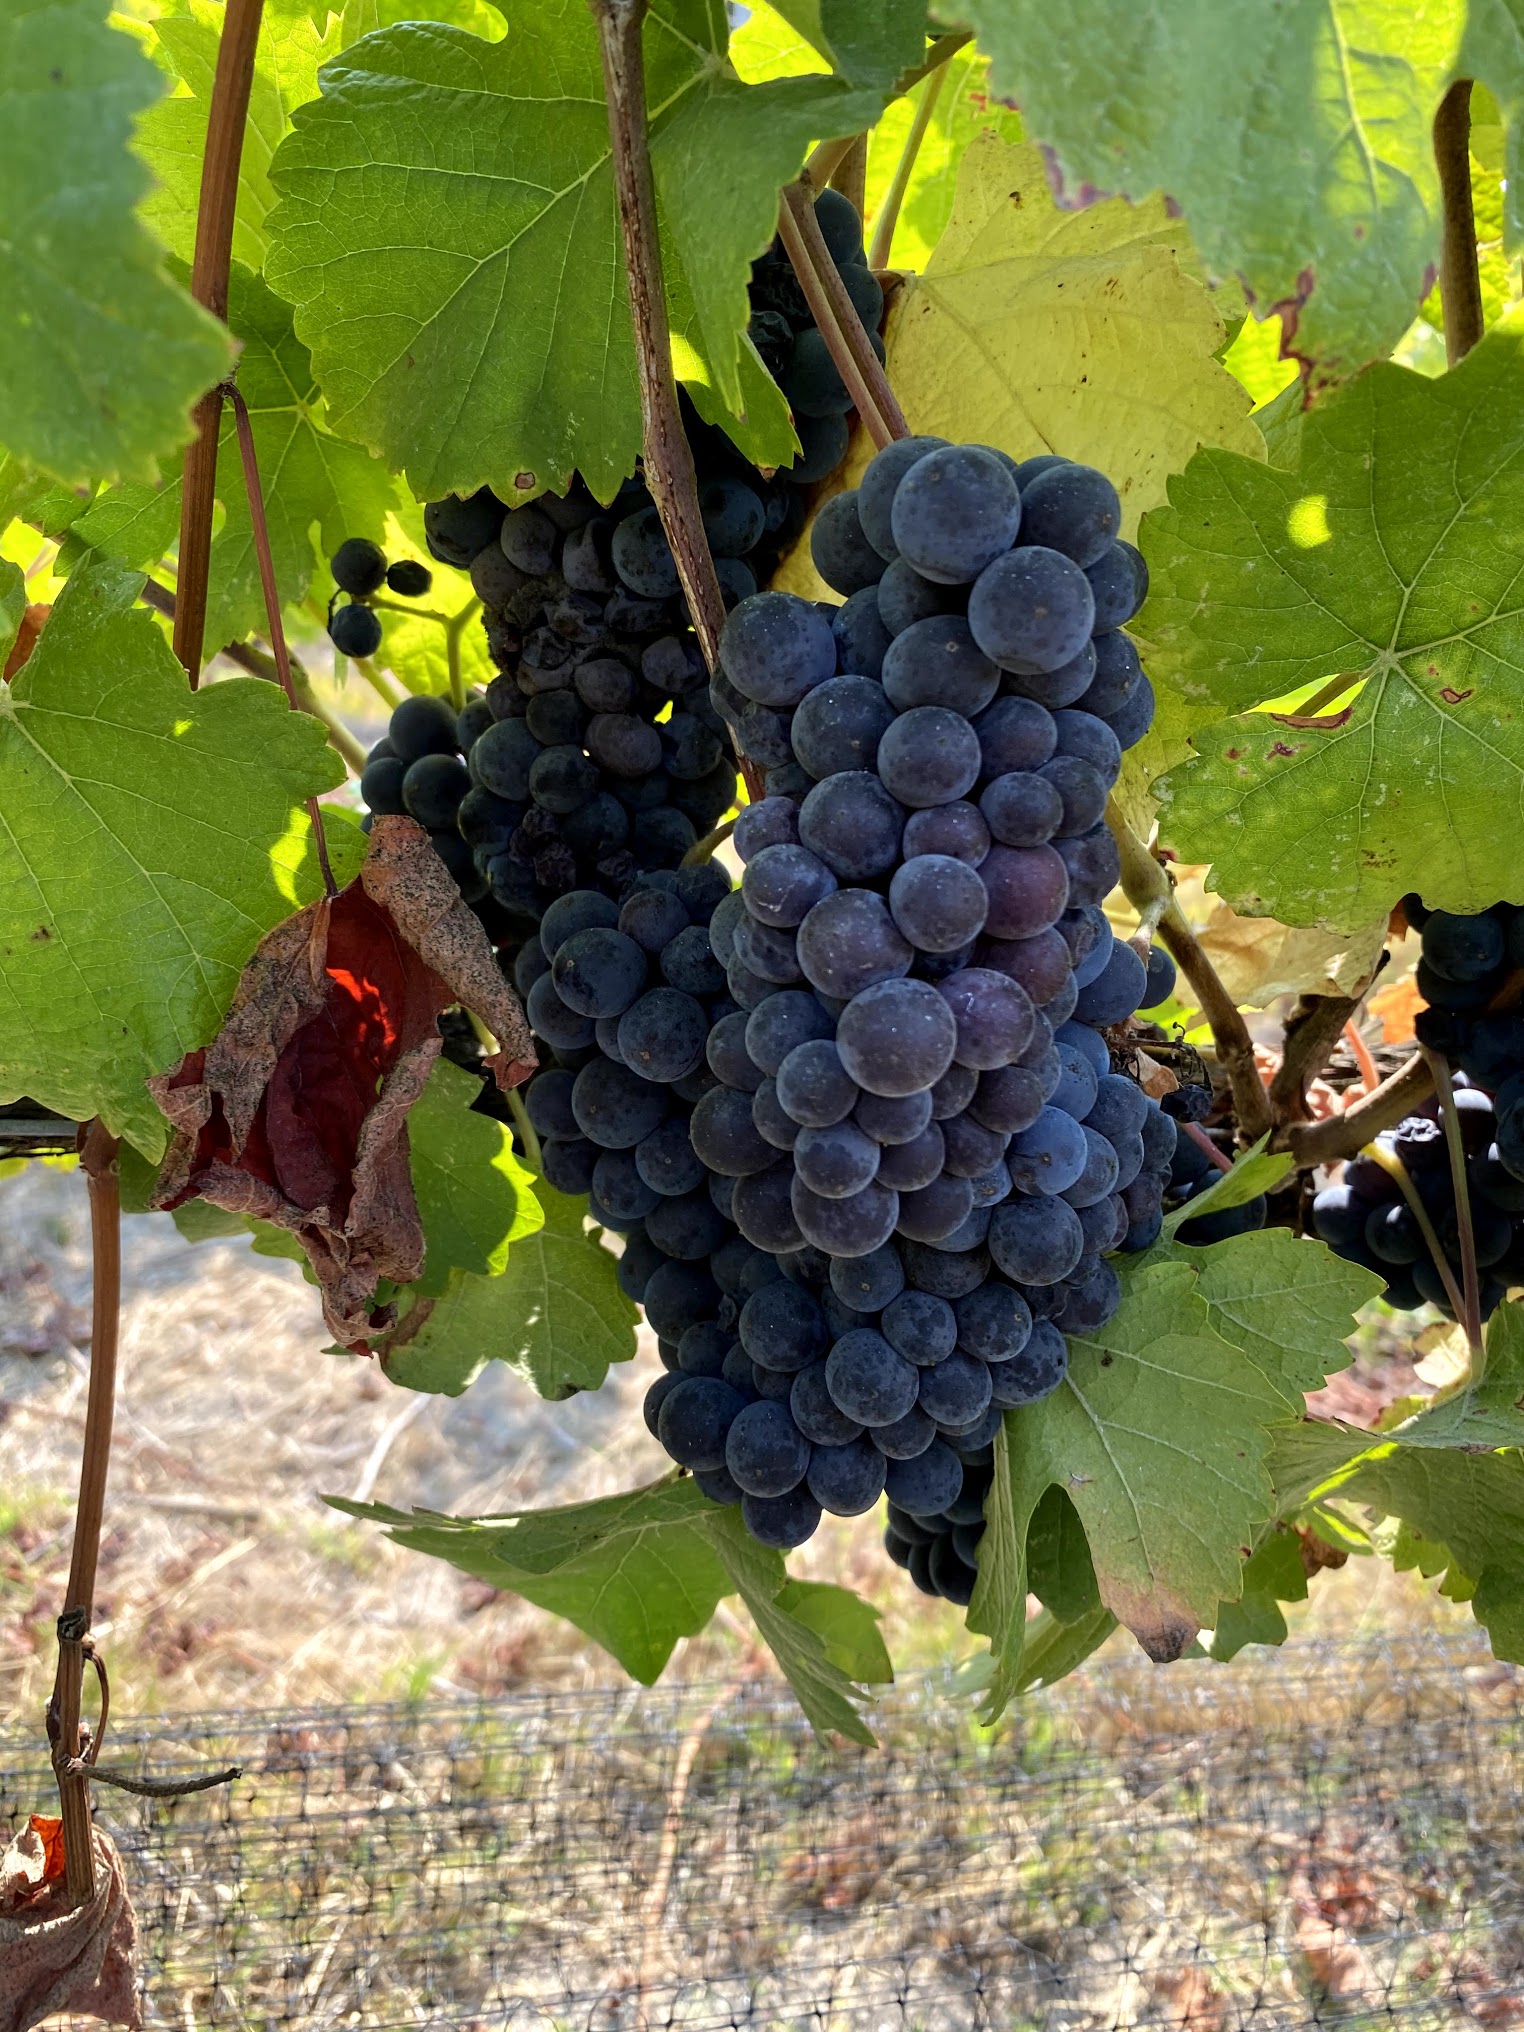
Many of the clusters had a couple of raisined grapes, but on the whole they were all plump, ripe and ready to be harvested. A ton of creepy crawlies and spiders webs come along with the fruit. Since we were picking a small batch by hand, it was feasible to brush those off between vine and bin.
Keeping everything clean
Nasty micro-organisms can spoil wine, so it’s important to keep all the bins, tubs, vessels and tools used in the process clean. There are several different chemicals and brands available to choose from, but we mostly used One Step no-rinse cleaner made by brewcraft USA. 1 Tbsp of one step makes one gallon of sanitizer, you wash everything in it and rinsing is not necessary.
Crushing and destemming
Traditionally wine has been made by crushing grapes by pigeage - treading on them with (clean!) feet and letting the natural yeasts and bacteria on the grapes do their job. We decided to make our wine this traditional way.
White wine is made by fermenting grape juice without contact with the skins, but red wine (like the Zinfandel we’re making) involves fermenting a must of crushed grapes - juice and skins - together. Prolonged exposure to the tannins in the grape skins gives red wine both its color and much of its distinguishing character. The yeast responsible for fermentation occurs naturally on the grapes in most wine growing regions.
In commercial wine making crushing to create must is done by machines. Commercial makers also don’t often rely on naturally occurring yeasts. These are killed early in the process by adding chemicals (potassium metabisulfite) and lab-cultured yeasts are used instead, which produces more deterministic results. We are risking the traditional method, because it seems like more fun - fingers crossed!
We stomped on our grapes in the same (sanitized) plastic tubs that we’d harvested into. Best results came from crushing 20 - 30 lbs at a time. More than 30 lbs makes it difficult to crush every last grape and lift the full tub to pour it in to the fermenter. As each batch was transferred to the crushing bin, we took a minute or so to remove any MOG - material other than grapes (that’s a technical term, apparently). This included leaves and rather a lot of spiders and earwigs.
Stomping on the grapes is a really satisfying and cathartic experience. We did this outdoors, stepping between a tub of sanitizer and the filled buckets of grapes to be crushed. Stomping 30 lbs takes about 10 mins - trying to leave no whole grapes uncrushed. You’ll be treading on a mixture of must - grape skins and juice and stems. During crushing, you want to get the stems out as best you can. My friend John said:
Two schools of thought: stems impart a “green” flavour to the wine and need to be removed at once! Sacre bleu! Or, some stems help impart tannins to the wine, which is good especially if you are aging in glass, not oak barrels. Also, they help during pressing by creating channels for the juice to flow out allowing for maximum extraction. I tend towards the latter and my wine doesn’t come out “green”.
In any case, I pulled out by hand all the big bits of stem (takes about 10 mins per batch). You really have to fish around for them as the must is completely opaque at this point.
Finally, we poured the must into our primary fermentation vessel, which is a fancy name for what is essentially a big trash can made of food grade plastic with a tight fitting lid, and repeated until all the grapes were crushed.
Sugar content
The alcohol in red wine comes from the fermentation of sugars in the must by yeast. It’s important to know what the initial sugar content is as it determines the eventual alcohol content and helps track the rate of fermentation. There are a few different ways to measure this, the most common being the Brix scale. Brix measures the concentration of sucrose in solution with water. Sucrose concentration is a pretty good proxy for all the sugars in the liquid must. One degree Brix is 1 gram of sucrose in 100 grams of solution.
Sugar content in must is measured using a nifty device called a hydrometer. In short, a wine hydrometer is a sealed and carefully weighted and calibrated glass tube that is close to neutrally buoyant. It has a narrow glass tube at the top with a scale you can read printed inside. The hydrometer floats at a particular height based on the sugar content which means that reading the level the hydrometer floats at in your must against the scale inside lets you see the current concentration of sugars in your grape juice.
To use the hydrometer, you take a small sample of the grape juice and pour it into a wide test tube which is deep enough for the instrument to float. Then, drop in the hydrometer and spin it. This works out any bubbles that might be pushing the hydrometer higher than it should be. Once it stops spinning (pretty quickly - the juice is quite viscous at this stage) you read off the bottom of the meniscus on the Brix scale.
Our must started at a Brix of 26.5 which is quite high (Zinfandel is usually harvested at 24 to 25 Brix). Starting with high sugar content means, by default, our wine will end up as strong stuff! It is possible at this stage to dilute the must with distilled water to get the Brix down to the level you want (you can increase by adding sugar too) but we opted to leave ours as it came off the vine.
Primary Fermentation
The first stage of red wine fermentation involves yeast metabolizing in the must which results in the conversion of sugars to ethanol. There are many wild yeasts which can facilitate fermentation but the most common one is Saccharomyces cerevisiae which is also used in bread making and the brewing of beer.
The chemistry of wine fermentation
The precise chemistry of fermentation is surprisingly complicated - it’s a multi-step process where enzymes first break down glucose into pyruvate through glycolysis (which is a sequence of ten enzyme-catalyzed reactions!) and then release carbon dioxide, producing acetaldehyde which is further converted to ethanol by yet-another enzyme. Similar pathways exist for other sugar molecules than glucose. The really cool thing about this is that it all happens inside the yeast cell as part of its metabolism. No yeast, no fermentation. This is all an anaerobic process and there exists a more chemically favorable pathway of aerobic respiration that could also break down glucose to form ATP. However, even in the presence of abundant oxygen, Saccharomyces cerevisiae prefer fermentation to aerobic respiration as long as there is an adequate supply of sugars which there thankfully is in our must.
In practice
Practically, primary fermentation (as opposed to malolactic fermentation - see later) lasts 1 - 2 weeks and for our batch of wine took place in a 20 gallon tub (~ a food grade trash can). We transferred all the must into this vessel, kept it indoors in the coolest place in the house and “punched down” twice a day for a couple of weeks. Punching down involves pushing the grape skins at the surface, which tend to get pushed up about 4 inches over the course of 12 hours as the escaping carbon dioxide disperses, all the way down into the must with a big spoon or spatula. It’s quite fun - the mixture bubbles and roils as you let more of the CO2 out. Once it’s punched down you’ll see grape juice on the surface. It’s important to wipe down the sides of the fermentation vessel after punching down to prevent the fruit outside of the must from spoiling.
This phase coincided with a particularly warm spell in San Francisco so fermentation both started quickly and seemed to proceed apace. By day 2 it already smelled quite alcoholic when punching down.
Acidity
On the first day we measured the acidity (pH level) of our must. Grape juice is acidic, and an ideal acidity level is around a pH of 3.3 or 3.4. We measured ours at 3.61 which is high (i.e. not as acidic as we’d like it to be). One thing that’s cool with wine making is that it’s always safe to taste the juice/wine throughout. I opted to add some tartaric acid, about 10g at a time while tasting a sample of the juice as I went to make sure it hadn’t altered the flavor. At this stage the must just tastes like sweet grape juice - it’s not wine yet. In total I added 30g of tartaric acid before I could tell any difference. Doing this early is useful as lower pH inhibits various sorts of bad bacteria and helps ensure that the good yeasts get a strong foothold. The pH the next day rose to 3.7 (it goes up as fermentation proceeds) so I added another 10g of tartaric acid but didn’t want to add much more for taste. This website will help you figure out how much tartaric acid to use.
Fermentation proceeds…
Primary fermentation takes 1 - 2 weeks, punching down twice a day. To see how fermentation is progressing, you can sample the must and measure the sugar content with a hydrometer. Unless you are trying to create a sweet wine, the goal is to have all the sugar be converted to ethanol. The opposite of sweet in this sense is dry. A dry wine is simply a wine that has no residual sugar. You can find plenty of fermentation charts online - plotting the Brix of the must over time. The typical profile is that it takes a couple of days to really get started, then accelerates to its fastest rate around day 5, then slows down as the remaining sugar concentration gets lower (i.e. rate of fermentation follows an exponential decay curve). We didn’t sample the sugar content often enough to plot a pretty curve, but here are the readings I did take:
Day 1: initial Brix: 26.5
Day 7: 1 week Brix: 16
Day 13: (Day of pressing) Brix: 4
Here’s what the juice in my must looked like after a week of fermentation - it tasted pretty good too though had a bitter tannic aftertaste at this stage.
Most advice on the web is to wait until the must is completely dry to proceed to pressing, but I decided to follow John’s advice:
I like to press at about 4 Brix. This leaves a little bit to ferment in the carboy which helps keep CO₂ in there and prevent spoilage.
With a Brix reading of 4, it was time to press the must.
Pressing
Pressing is how we get all the juice out of the must and transfer it into secondary fermentation vessels. To achieve this, we need a special piece of equipment - a wine press - which can apply very significant pressure to the skins, pips (grape seeds) and remaining stems. This allows us to extract much more juice than would simply flow out by filtering the juice from the skins etc through a sieve.
Free-run
The first step, though, is to dump the must into the wine press without applying pressure and capture the free-run juice.
Before starting to press, it’s necessary to have the correct sizes of secondary fermentation vessel to hand. We were pressing into glass carboys and expected to have about 10 gallons of wine in total. During the next stage of fermentation, it’s important to have as little air in the carboys as possible to avoid oxidation (which turns wine to vinegar). Therefore to hold 10 gallons (plus or minus a gallon), we used a 6.5 gallon, 3 gallon and 1 liter carboy - filling the biggest one almost to the brim before moving on to the next size down. It is also possible to use small oak barrels for secondary fermentation but they are rather expensive. We will add some oak chips later to (hopefully) achieve the same flavor.
We then started to capture the free-run:
- put a (sterilized) 3 pint bowl under the press
- move about 2 pints of must from primary fermenter to press using a glass jug
- wait for the bowl to fill
- pour the contents of the bowl through a sieve and funnel into the carboy
We had to be careful not to let the wine press overflow at this stage, but also found we could get a continuous rhythm going by using two bowls and two sieves in rotation. The sieve will capture a lot of sediment and needs to be rinsed out every other batch or so. At the very end of this step, we simply upended the primary fermenter and poured all the remaining pips and juice into the press. The free-run from our 120 lbs of grapes just about filled a 6.5 gallon carboy.
First pressing
For the first pressing, we used a ratchet press. A threaded post runs up the full height of the center of the press (it’s a bit like a very long bolt running up the middle of a wooden cylindrical basket). A two-piece pressing head sits on top of the must and the ratchet plate pushes down on it. The ratchet plate threads on to the central shaft (a bit like a nut onto a bolt) and applies pressure on the pressing head as the ratchet is cranked.
The first pressing proceeded just like the free-run - cranking the ratchet until a bowl of wine emerged then filtering it in to the carboys. When you reach the full range of travel of the ratchet head (the lever will eventually collide with the top of the basket), you can stack wooden spacers between the pressing head and the ratchet to get more vertical travel. It was fairly obvious when the pressing was complete as it became extremely difficult to move the ratchet lever by hand. We decided not to move on to a second pressing as we had exactly filled our 3 gallon carboy and didn’t expect to get enough juice out of a second pressing (which would have involved stirring up the must and re-pressing) to fill the next size down.
We had about 750ml of wine left over, which we tasted. It was surprisingly drinkable at this stage and both looked and tasted like wine, albeit without much depth at all to the flavor.
Once the carboys were filled, we stoppered them with airlocks - the next stage of fermentation is anaerobic, but carbon dioxide must be able to escape. The airlocks are filled to the max-fill line on both sides with about 10ml of sanitizer solution.
Secondary fermentation
There is still some sugar left in the wine after transfer to carboys, so fermentation by yeast of sugar to ethanol continues in the new vessels. As a consequence, we could see lots of carbon dioxide bubbles rising up the outside of the carboys and the airlocks bubbled every few seconds for the first couple of weeks.
Malolactic fermentation
Once ethanol fermentation has completed, and assuming the right kind of microorganisms have survived in the wine, another process called malolactic fermentation (MLF) will begin to work its magic. MLF doesn’t produce ethanol. Instead a set of bacteria (not yeast!), fed by remaining complex sugars in the wine will convert tart-tasting malic acid into the smoother, buttery tasting lactic acid.
The history and science of malolactic fermentation
Re-racking
As fermentation completes, the dead yeast and other particles (the “lees”) settle out at the bottom of each carboy. A thicker and thicker layer of detritus collects which is known as the gross lees (I think that’s a pretty apt name). Eventually it’s time to decant the wine into clean containers to stop the lees spoiling the wine. We did this in early December by siphoning the liquid into new carboys (well, one new one and one of the original ones that we washed just in time to refill). If you haven’t used a siphon before it feels kinda magical - by starting the flow of liquid through a sealed tube and keeping the outflow vertically below the inflow liquid will flow continuously without the need for a pump. We used a clear food grade plastic tube for our siphon. It can apparently be quite tricky to suck up just the wine, avoiding the lees, using a simple tube. We therefore also picked up a “siphon wand” which is a rigid, straight, plastic tube with a little bowl on the end - the bowl sits on or near the bottom of the carboy but stops gunk being sucked up from the bottom of the vessel. The flexible tube connects to the end of the siphon wand. You then start the flow of wine by sucking liquid up into the tube - we simply used mouth/lungs for this though you can also get an “auto-siphon” which has starter pump action (spoiler: we decided we needed one for bottling so just buy it now). Once the tube is nearly full, you cover the end with your thumb to maintain a vacuum, then put the free end into the new carboy. Assuming this is physically lower than the original vessel, wine flows.
We started by draining our smaller carboy into a new larger one, then drained the old larger one to top it off and then fill the smaller one (newly washed and sterlized).
Oak
Many of the finest red wines are aged in oak barrels. Oak adds flavor compounds: vanilla, spices etc. Wooden barrels also allow gradual and gentle exposure to oxygen which makes the wine taste smoother. It is possible to put your homemade wine in oak, but the barrels are relatively expensive. Instead of aging in oak barrels, you can get specially designed oak sticks to put directly in the glass carboy with the wine. We added some at the second re-racking in the spring.
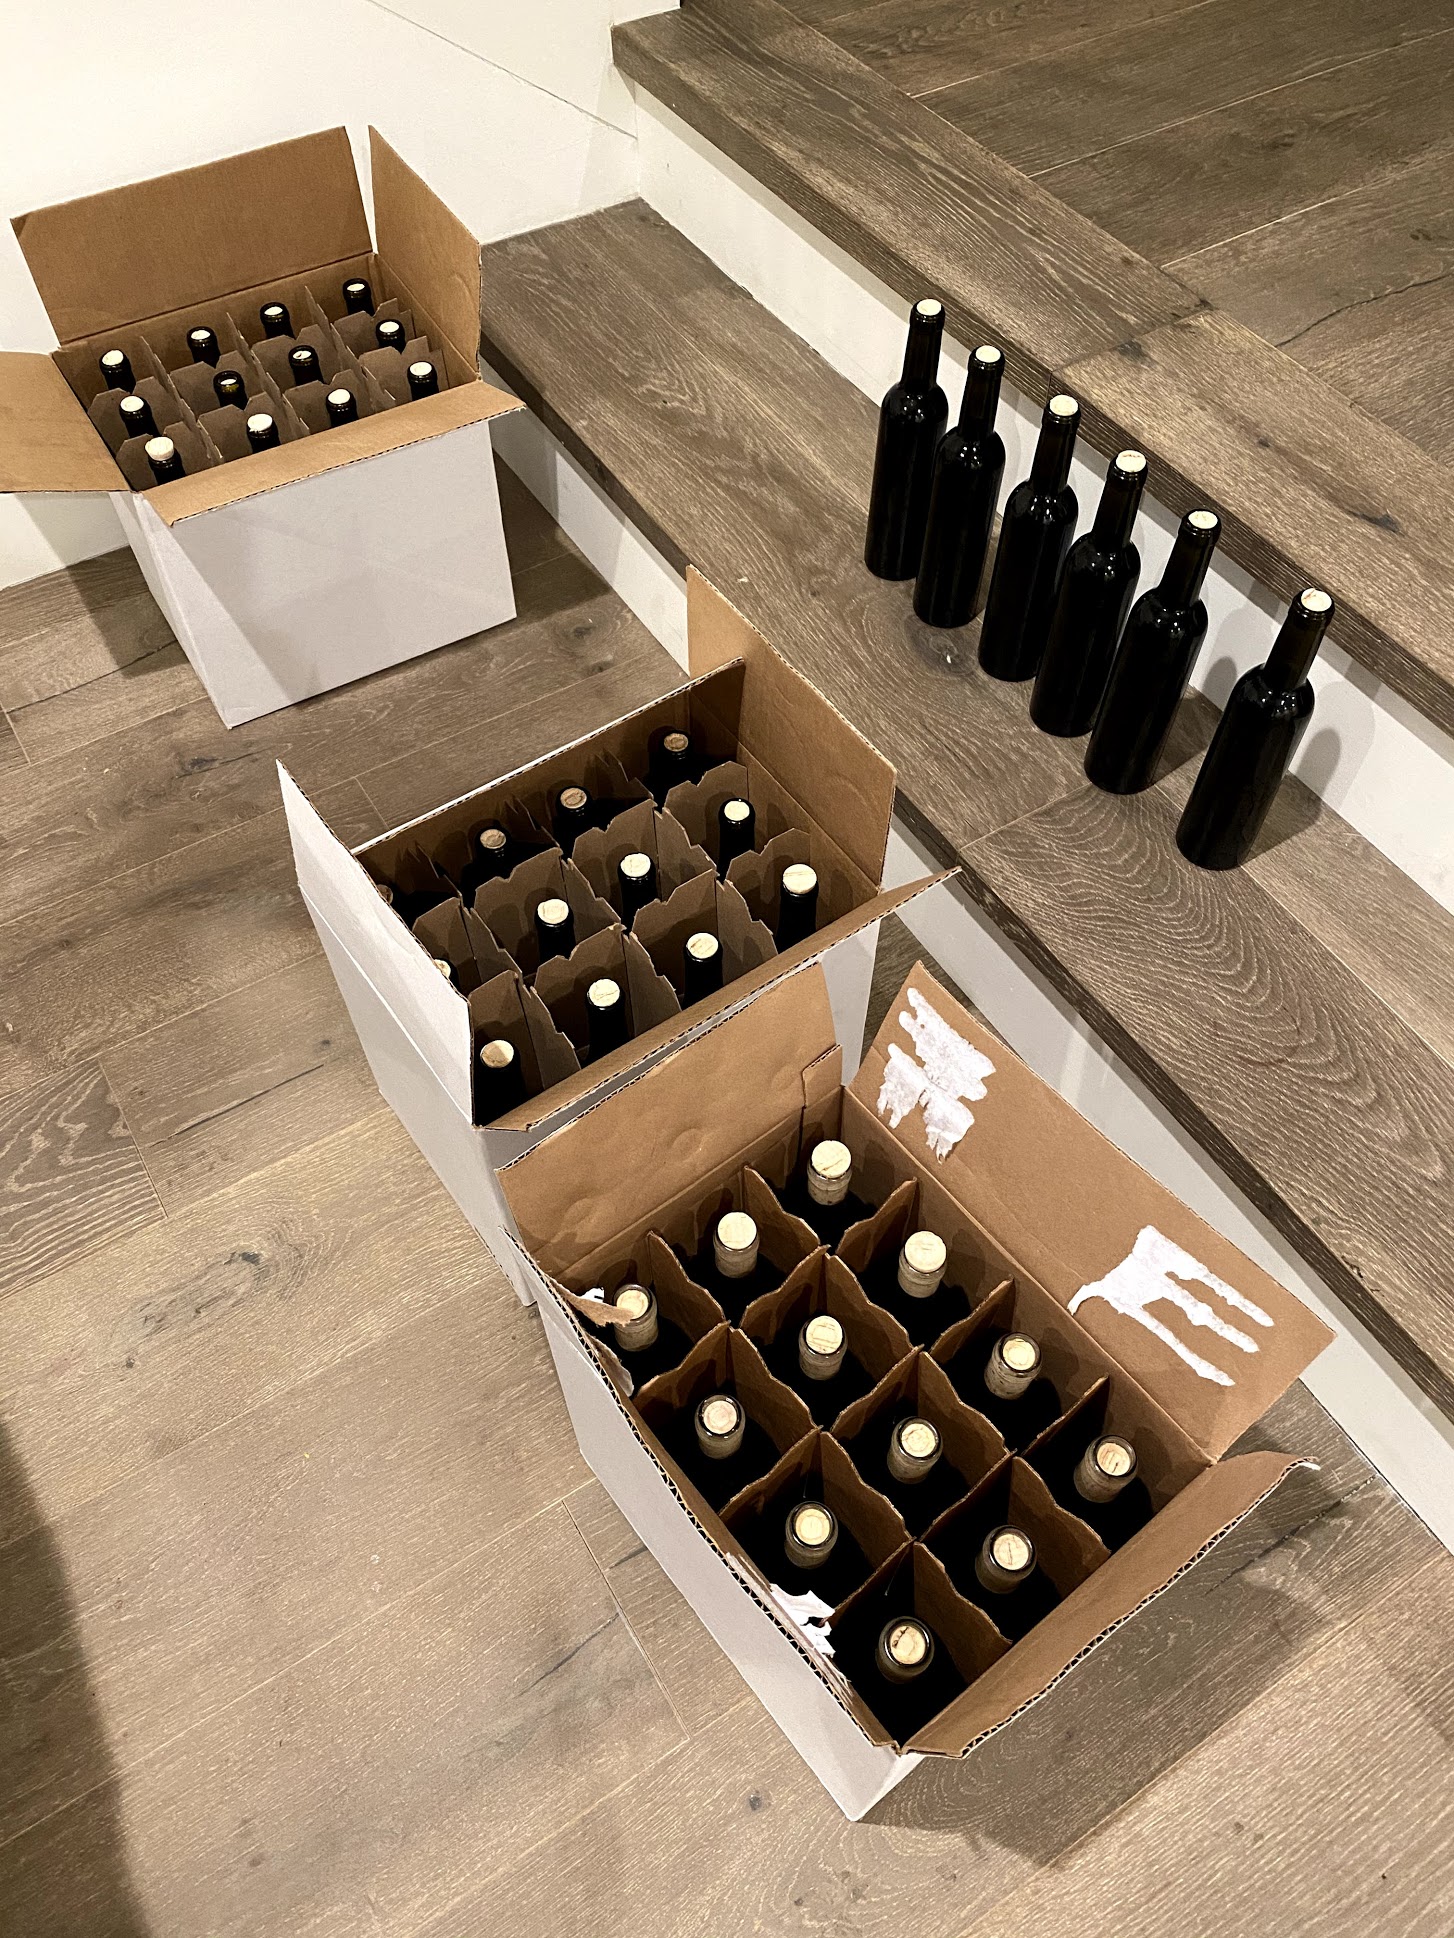
Bottling
A year after pressing, we decided that the time had come to put our wine in bottles. (We needed the carboys back for next year’s vintage, which is a Pinot Noir.) Bottling is a lot of fun. You will of course need bottles. You can collect old bottles, steam off the labels and clean them but it’s much easier to buy new ones. We got ours from OakBarrel Winecraft. Before bottling we tasted the wine from each of our carboys and decided to mix them. (One was mostly free-run wine and the other was pressed, so they had quite a different character.) The blend is fuller bodied and smoother than either was alone. We mixed by siphoning into a larger carboy and then filled the bottles from there.
This is also done by siphoning, but with a bottling wand fitted to the lower end. This is a valve that opens when you press it to the bottom of the bottle and closes when you lift it out. The wand itself displaces a little bit of wine so once you fill the bottle to its literal brim, then pull the wand out the bottle is perfectly filled with wine just into the neck.
Corking
Once the bottles are filled, it’s time to seal them and approximately the only way to do this at home is with a cork. This is a lot of fun too. As shown in the video on the right, you put a straight cork in corking machine (we used a double lever hand corker) and push it in with a single smooth (if slightly violent) action. The corking machine has a tapered funnel that compresses the cork from all sides so that it fits the neck of the bottle. There’s a bit of a knack to getting the cork at the right spot - fully in the neck of the bottle but without a gap on top.
Labels
 A “great” wine needs a great label, right!? Oh and a name. Let your creative juices flow. Perhaps lubricated with un verre du vin. I designed a label and had it printed by sheetlabels.com
Yield
Here’s all the wine we made. Our 120 lbs of grapes produced 3-and-a-bit cases of wine. And, how does it taste? At bottling, definitely better than two-buck chuck, but we’ll leave it in bottles for at least 6 months before starting to drink it.
Tasting
Our wine was bottled in September 2020. We started drinking it in 2021. While it is still a bit young, it tastes remarkably good! It’s very fruit forward and extremely drinkable. We’ve given a few bottles to friends and look forward to opening our 2019 Primativo on special occasions for years to come.
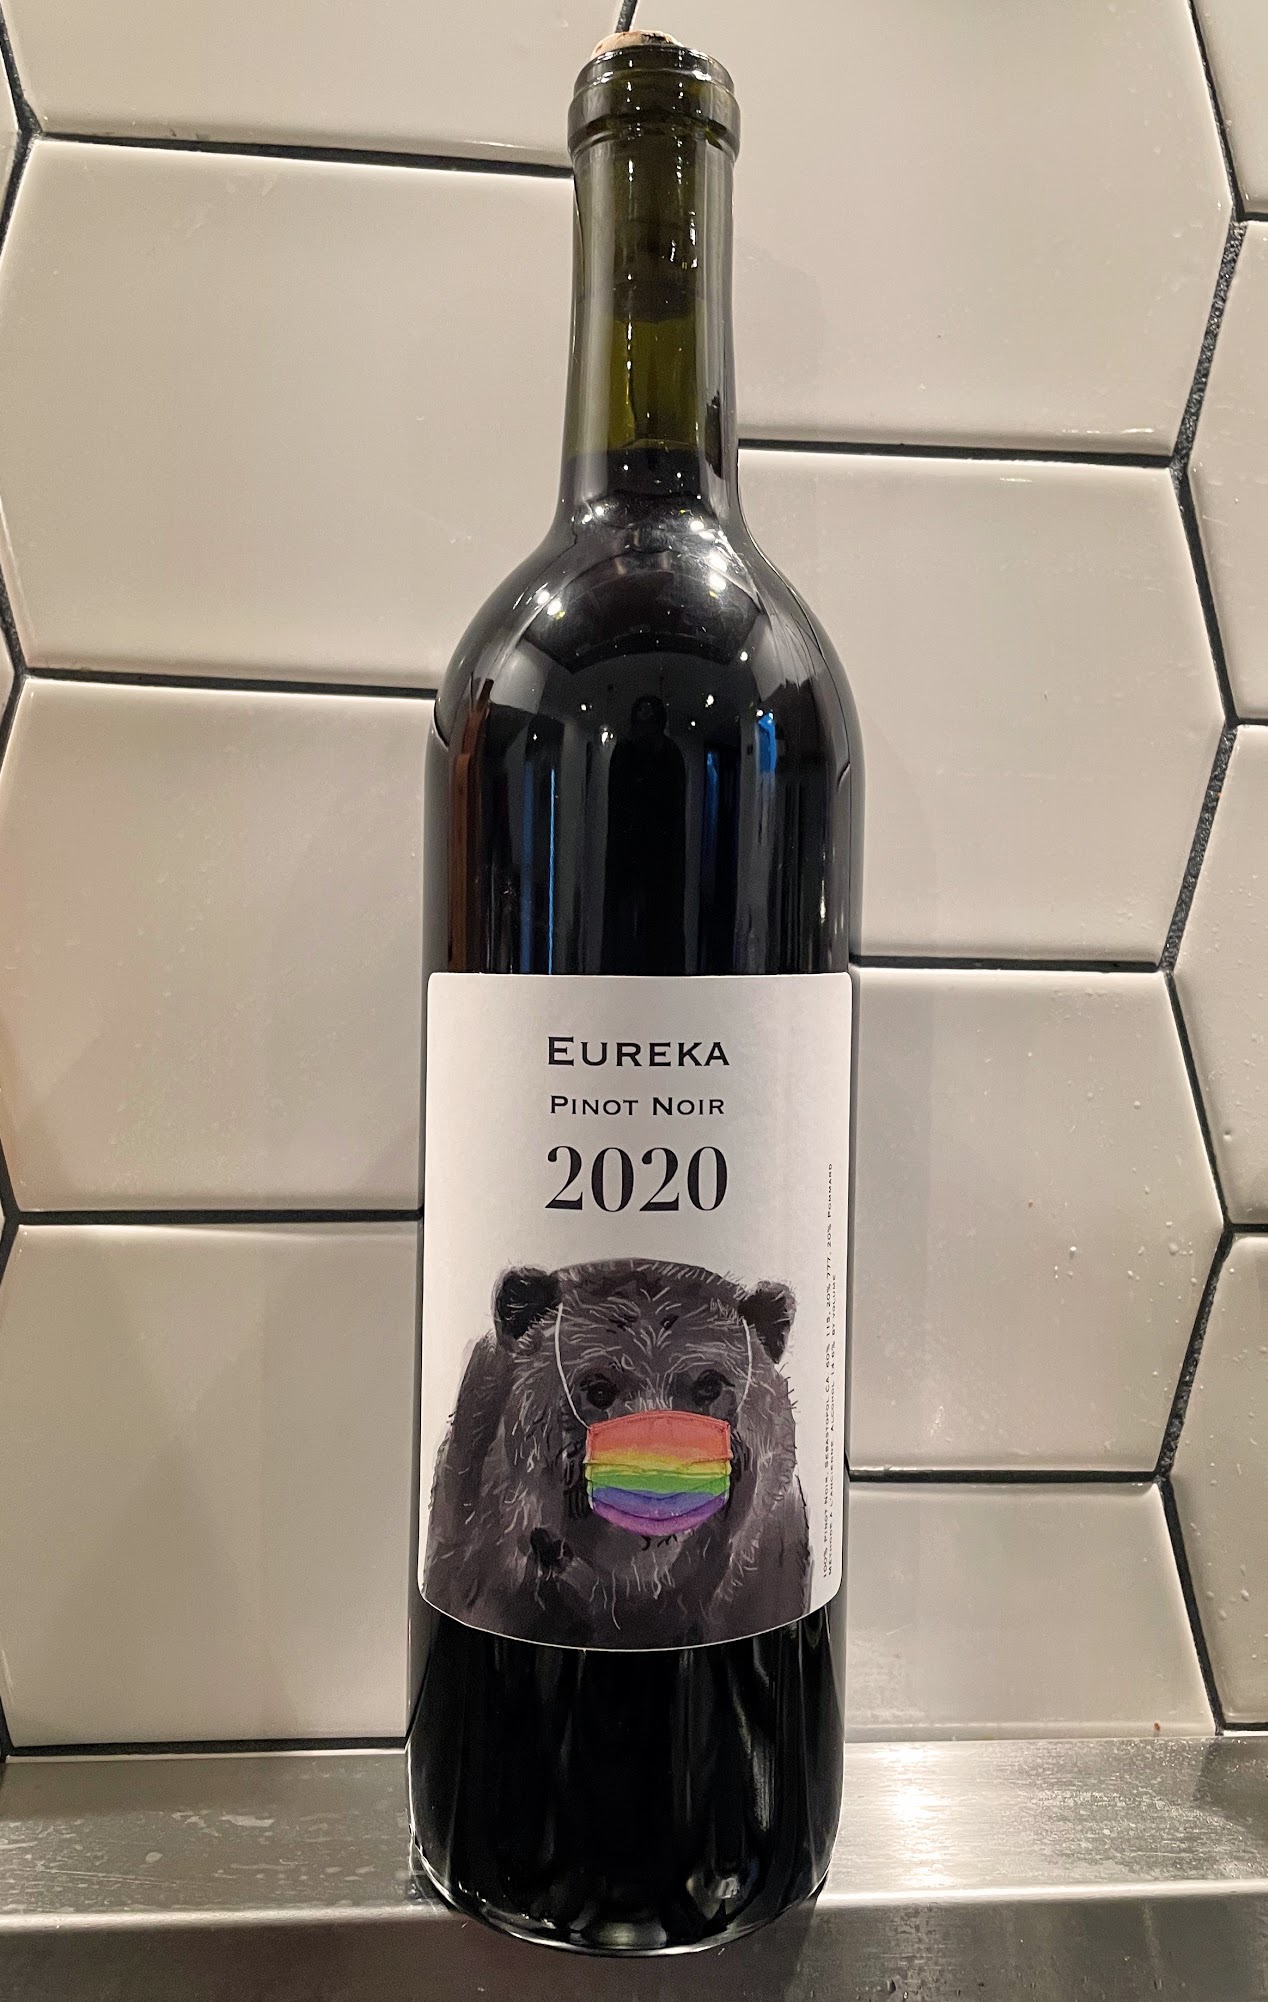
2020 Pinot Noir
 Our 2020 vintage is a (tricky!?) Pinot Noir which was harvested at the height of the COVID-19 pandemic and amid wildfires in wine country. The vineyard we harvested from avoided the worst of the fires and smoke, but there was still a little bit of ash on all the grapes, which apparently shouldn’t present problems. There are hundreds of different varieties - clones - of Pinot Noir grapes. Ours is a field blend of 60% 115, 20% 777 and 20% Pommard. That means of the 120 lbs of grapes we picked, we took 60% of them from a 115 clone, 20% Pommard etc.
2021 Cabernet Sauvignon
Our 2021 vintage is a classic Cabernet Sauvignon. It’s still in carboys after secondary fermentation and will be re-racked soon.
2022 86% Cabernet Sauvignon, 14% Merlot
Our 2022 grapes came from the same place as 2021 (Kenwood, CA) and it is a “Bordeaux” blend of Cabernet Sauvignon and Merlot.
To be continued…
Books
The Way to Make Wine by Sheridan Warrick.
Links
Sacramento home winemakers have some Zinfandel tips, though not as traditional as the process I’m following, I found this useful.
Data
2019 Primativo
Initial Brix: 26.5 [9/22 22:40]
Initial pH: 3.61
Added 40g tartaric acid on 9/26
1 week Brix: 16 [9/29 13:40]
Pressing Brix: 4 [10/4 18:38]

2020 Pinot Noir
60% 115
20% 777
20% Pommard
Harvest: 120 lbs

Target:
3.2-3.3 harvest pH, 22 - 25 brix, .65 - .8 TA

Initial Brix: 26.3
Initial pH: 3.98
Added 15g tartaric acid 9/21 9pm
Target 3.6 pH
Added another 111.3g tartaric acid 2 days later
pH meter 3.26 (though meter calibration suspect)

Pressing on 9/29
Free run: 6.5gal

2021 Cabernet Sauvignon
Harvest: 117 lbs 9/18/21
Initial Brix: 25.0
Initial pH: 3.80 (meter calibration still suspect!)
Acidulated with 75g tartaric acid 9/26 9:30am
9/27 6pm Brix: 13.5, pH 3.35 (tastes quite tart... hope I didn't add too much tartaric!)
9/30 6pm Brix: 6.5
10/1 8pm pressing Brix: 4 pH: 3.7 => pressed total 8 gal

2022 Cabernet / Merlot
Harvest: 120 lbs 9/17/2022; 103 lb Cabernet Sauvignon, 17 lbs Merlot
Initial Brix: 22.5
10/6 Brix: 0.0 pH: 3.5